Color picker in Motiff
The color picker in Motiff enables you to add solid colors, gradients, or image fills to layers, including text, strokes, and vector objects.
It allows precise adjustments to hue, saturation, opacity, and blend modes, offering flexibility for refined design control.
About color picker
Access the color picker by adding a fill or stroke and clicking the color well in the design panel.
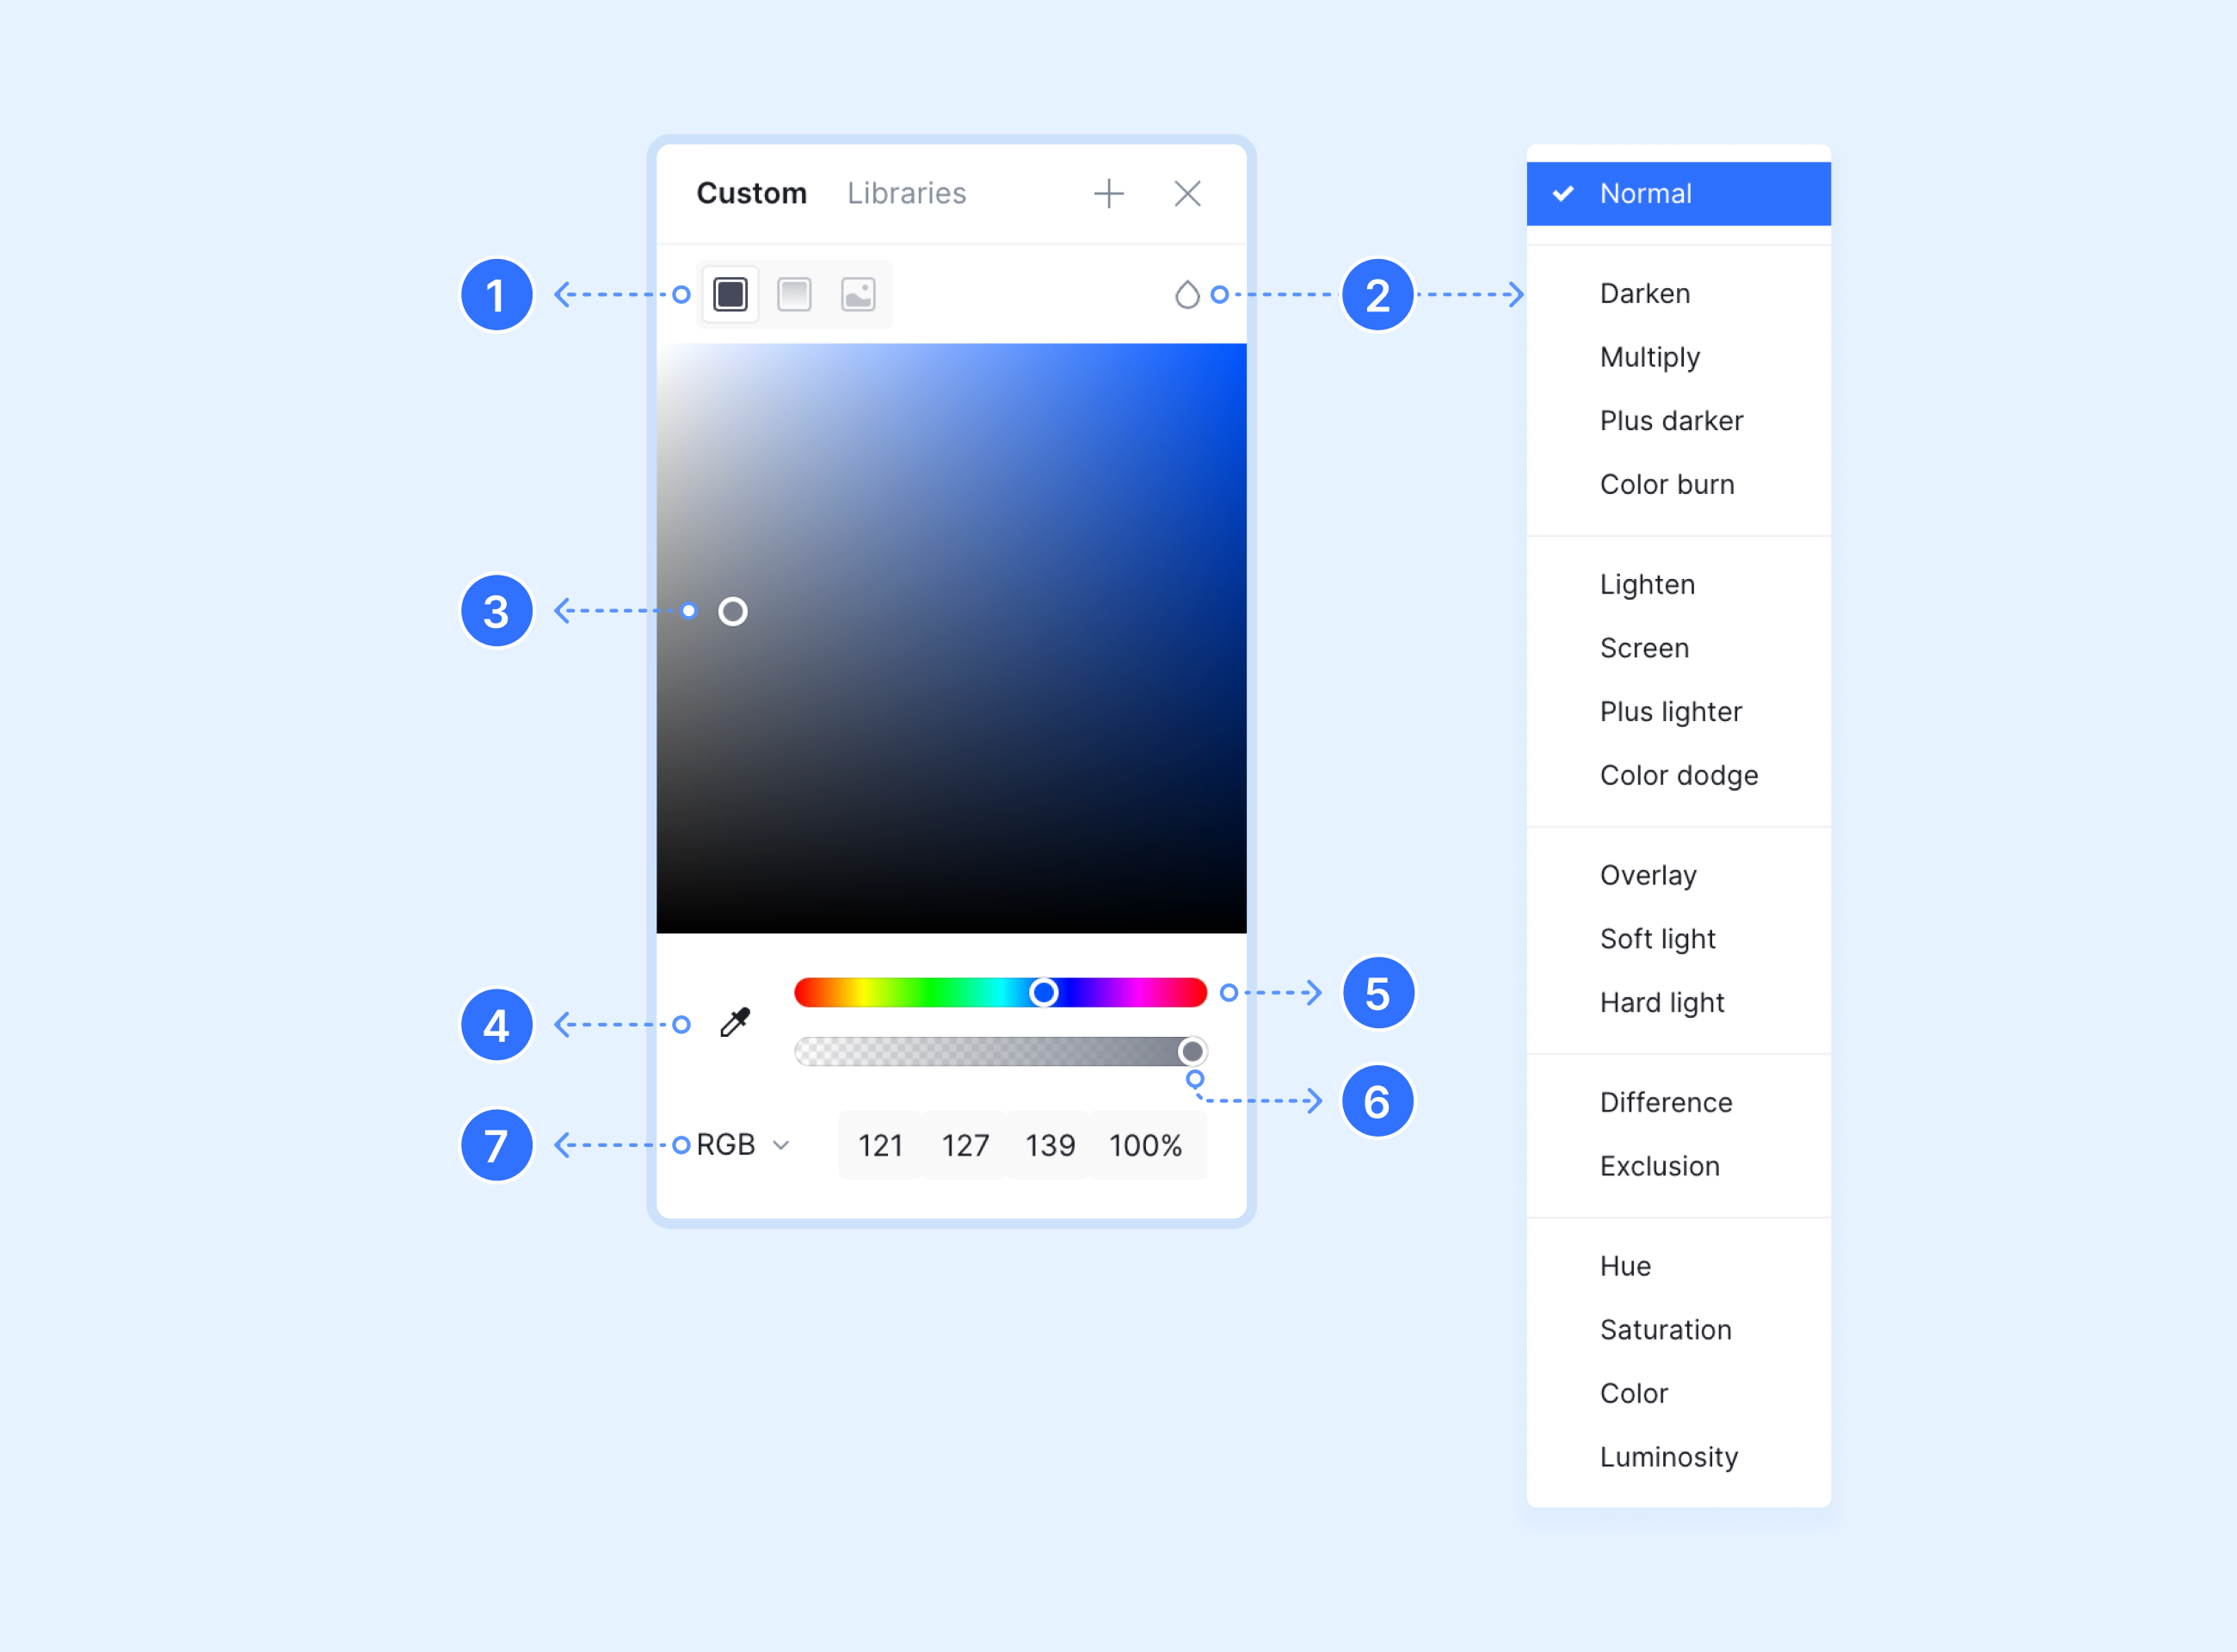
You can view and adjust following color properties:
- 1.Click
 in the upper left corner to select any color type from solid color, gradient, or image.
 - 2.Use
 to toggle the layer's blend mode.
 - 3.The white circle in the color palette represents the current color. Click and drag the circle to adjust any color.
- 4.Click
 and select the eyedropper tool, which allows you to pick and select colors from any layer or image on the canvas.
 - 5.Use the slider below the color palette to adjust the hue. Click and drag the circle left or right to adjust.
- 6.Use the second slider to adjust the color's opacity.
- 7.Click
 to switch between the five color models: RGB, HEX, CSS, HSB, and HSL.
Tip: When selecting colors through the slider in the color palette, you can adjust by scrolling the mouse wheel or touchpad. Press the modifier key ⌥ Option / Alt during scrolling allows for quick opacity setting.
Gradient colors
Motiff supports four types of gradients, enabling precise control over color transitions for dynamic and visually engaging designs.
- Linear gradient: A progressive transition between two or more colors along a straight line. You can choose the angle of the line by yourself.
- Radial gradient: A circular gradient that transitions from one color at the center to another color at the edges. You can choose the angle of the radius and the size of the diameter.
- Angular gradient: Creates a gradient clockwise from the starting point. To create a softer or rougher angle, you can adjust the position of the two colors in the gradient.
- Diamond gradient: A gradient with four points starting from the center of the layer. You can adjust the weights and heights of the gradients individually.

Use eyedropper tool
The eyedropper tool can identify the colors of layers or images in the file and apply them to the target layer:
- 1.Select the layer you want to edit.
- 2.Use the keyboard shortcut i to open the eyedropper tool.
- 3.Hover the cursor over the color you want to sample on the canvas. At this time, the magnifying glass window will display the color of the sampled pixel and the hexadecimal color code.
- 4.Click to apply the picked color to the selected layer.
If you want to reuse colors in your design file, you can save colors, gradients, and images as styles.